
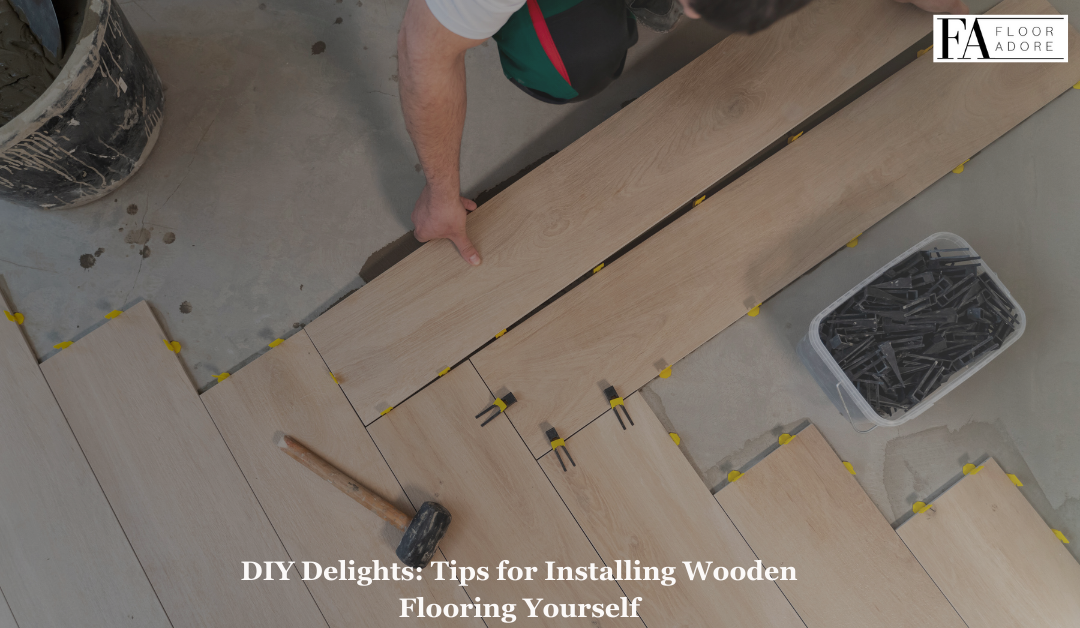
Installing wooden flooring can be a rewarding DIY project that adds warmth, character, and value to your home. With the right tools, materials, and techniques, you can achieve professional-looking results while saving money and gaining a sense of accomplishment. Whether you’re a seasoned DIY enthusiast or a novice looking to tackle your first flooring project, here are some valuable tips to help you navigate the process with confidence.
Choose the Right Flooring
Before diving into your DIY flooring project, take the time to select the right type of wooden flooring for your space. Consider factors such as wood species, plank size, finish, and installation method. Solid hardwood, engineered wood, and laminate are popular options, each with its advantages and considerations. Solid hardwood offers timeless beauty and can be sanded and refinished multiple times, while engineered wood is more stable and suitable for areas prone to moisture. Laminate flooring is budget-friendly and easy to install but may lack the warmth and authenticity of real wood. Choose the option that best fits your budget, aesthetic preferences, and practical needs.
Prepare the Subfloor
Proper preparation of the subfloor is essential for a successful flooring installation. Ensure that the subfloor is clean, level, and free of any debris or protrusions that could affect the integrity of the new flooring. Repair any cracks, gaps, or uneven areas, and install an underlayment if necessary to provide a smooth and stable surface for the wooden flooring. Taking the time to prep the subfloor will help ensure a seamless and long-lasting installation.
Acclimate the Wood
Wood is a natural material that responds to changes in temperature and humidity. To prevent issues such as warping, cupping, or buckling after installation, it’s important to acclimate the wood to the environment in which it will be installed. Stack the flooring planks in the room where they will be installed and allow them to adjust to the ambient conditions for at least 48 hours before beginning the installation process. This allows the wood to reach equilibrium with its surroundings, reducing the risk of future problems.
Gather the Right Tools
Having the right tools on hand can make all the difference when installing wooden flooring. Essential tools for the job may include a circular saw or miter saw for cutting planks to size, a pneumatic flooring nailer or stapler for securing the planks to the subfloor, a tapping block and mallet for fitting the planks together, and a spacer tool for maintaining consistent spacing between planks and walls. Additionally, you may need a level, tape measure, pencil, safety goggles, and knee pads to ensure accuracy and protect yourself during the installation process.
Follow Manufacturer Instructions
Before beginning the installation, carefully read and follow the manufacturer’s instructions for your chosen flooring product. Different types of wooden flooring may have specific requirements and recommendations for installation, including proper acclimation, subfloor preparation, and installation techniques. Pay close attention to details such as expansion gaps, adhesive application methods, and plank orientation to ensure a successful and long-lasting installation. Following manufacturer instructions will help you avoid common pitfalls and ensure that your DIY flooring project is a success.
Take Your Time and Be Patient
Installing wooden flooring is a labor-intensive process that requires precision and attention to detail. Take your time and work methodically, following each step of the installation process carefully. Measure twice and cut once to avoid wasting materials, and double-check your work frequently to ensure accuracy. Be patient and don’t rush the process—quality craftsmanship takes time, and the results will be well worth the effort in the end.
In conclusion, installing wooden flooring yourself can be a rewarding DIY project that enhances the beauty and value of your home. By choosing the right flooring, preparing the subfloor properly, gathering the necessary tools, following manufacturer instructions, and taking your time, you can achieve professional-looking results while saving money and gaining a sense of accomplishment. With these tips in mind, you’ll be well-equipped to tackle your DIY flooring project with confidence and skill.


